
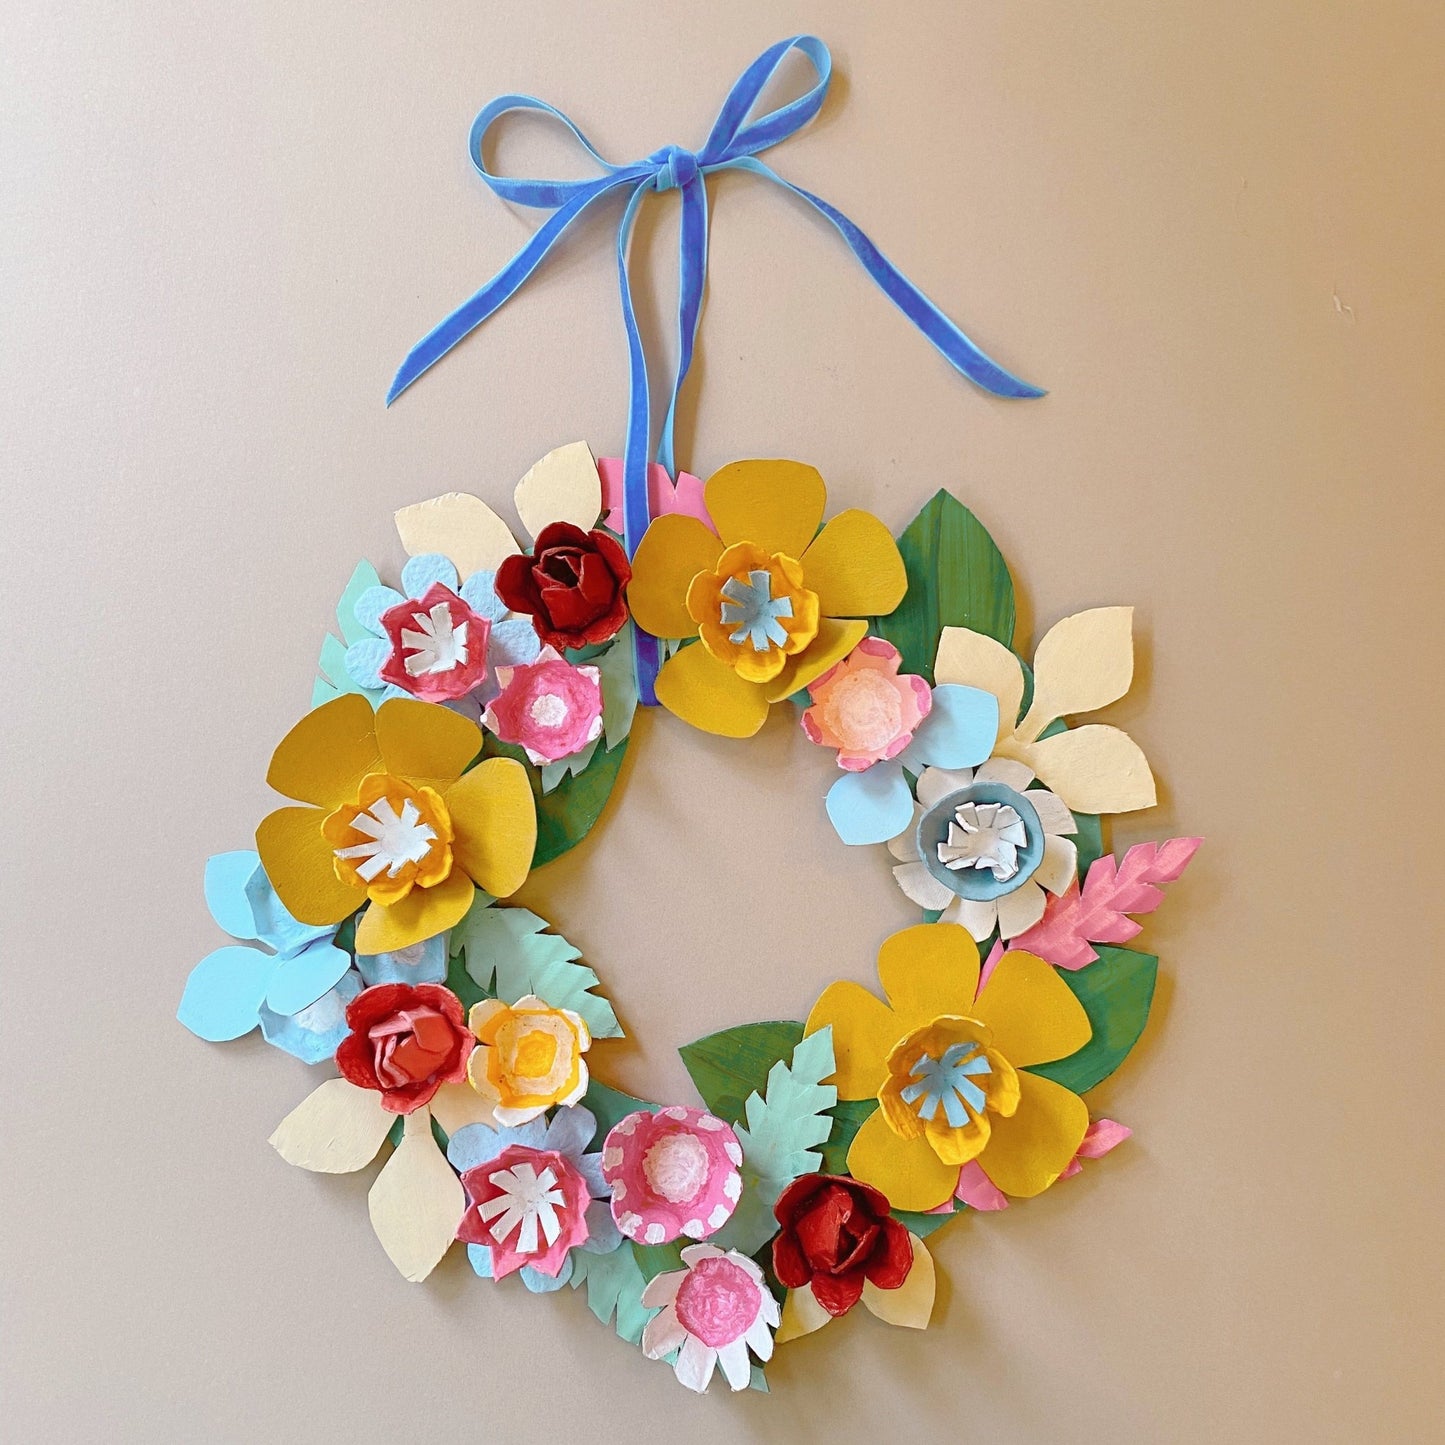
This spring why not create some magic out of, well literally junk! This exquisite egg box wreath is a bit of a MakeBox craft icon. It not only egg-ellently uses up unwanted egg boxes, the result is quite literally stunning. Heres how!
YOU WILL NEED

- 4 x half dozen (6 hole) or 2 x dozen ( 12 hole) egg boxes with indentations
- Strong cardboard
- Medium cardboard
- Dining plate
- Tea Saucer
- Glue gun and glue sticks or PVA glue
- Sharp household scissors
- Pen or pencil
- Ruler
- Acrylic or poster paints in colours for flowers and leaves
- White acrylic paint
- Paint brush
- Ruler
- Ribbon to hang

METHOD

MAKING THE BASE
You will need
- Strong cardboard
- Dining plate
- Tea Saucer
- Sharp household scissors
- Pen or pencil
- White acrylic paint
- Paintbrush

Draw around the outside of the dining plate and cut out the circular shape.
 Place the tea saucer in the centre of the circle and draw around the outside.

Cut out the middle as neatly as possible.

Paint with the white acrylic paint and allow to dry fully.
MAKING THE FLOWERS
The daffodils
You will need
- Medium cardboard
- Small bowl
- Egg box
- White acrylic paint
- Paint brush
- Yellow acrylic or poster paint
- turquoise acrylic or poster paint
- Glue gun and glue sticks
- or PVA glue
- Ruler

- To create the bottom petals, cut out a 8-9cm ( 3 1/2 inch) circle from the cardboard. You can use a small bow to draw around.
- Mark five inward lines equidistance apart as shown in the image.
- Snip these marks.
- Cut curved petal shapes into the snips as pictured.

- To create the inner petals and stamen of the flower, cut the top off one of the egg cup shapes within the egg boxes and cut petals into the sides.
- Using the smaller upper moulds of the egg boxes create a feathered shape for the stamen.
- Paint these white with the acrylic or poster paint, allow to dry fully.
- Paint these with colours as pictured or your choice of tones.
- Make three daffodils for your wreath.
The rose buds
You will need
- Egg box
- Red acrylic or poster paint
- White acrylic or poster paint
- Glue gun and glue sticks
- Sharp household scissors

The roses consist of two egg box cups, one for the outer petals and one bud shape for the inner petals.
- Cut our two egg cup shapes from the egg box.
- Paint them with the white paint first and allow to dry, then the red.
- Snip one of the shapes into the middle as pictured.
- Create the bud shape by curving the sides over one another and gluing into place.
- glue the bud on top of the outer petals.
- Make three rose buds for this wreath.
ABSTRACT SPRING FLOWERS
For the remaining flowers have fun playing with shapes and sizes of the egg box cups creating petal shapes along the sides of them as pictured. The designs can be layered or used individually.

- Always paint the designs white before applying the coloured paints.

- To create base petals, you can use the tops of glasses and cups to create varied circular sizes to work from. The dappled texture of the boxes can create extra interest.

- Use the top flat sections of the egg boxes to create base petals, then layered up with egg cup petal shapes and stamens.
- Use the glue gun or PVA to attach the layers together.

CREATING THE LEAVES

- The leaves can be cut either from the tops of the egg boxes.

- Or from spare cardboard.

- Draw out the leaf shapes onto paper creating patterns that you can repeat.
COMPILING THE WREATH
Once you have made all your elements you can attach them to the wreath.
- Paint the wreath base green.

- Arrange the design first before committing. Laying the leaves first then the flowers.
- Once you are happy attach with the glue gun or PVA and allow to dry fully.
- Wrap a piece of ribbon around the wreath to hang.


Congratulations! You have created a wonderful design!
Come and share them with us on instagram or Facebook using #mymakebox we can’t wait to see.
Happy spring! x